HG612 on CenturyLink
The Huawei HG612 is a DSL Modem/Router that supports ADSL2, ADSL2+, VDSL2, G.Dmt and T1.413 signalling. It is used by British Telecomm in the UK but new, unlocked versions are available for about $40 delivered on Ebay. This guide assumes that your HG612 is already unlocked. I’m using the unlocked B030SP08 firmware.
All current CenturyLink-provided DSL modems built-in WiFi. The only non-WiFi DSL modem is the old Zyxel Q100 which only supports VDSL2. I wanted a simple but flexible DSL modem that I could use in place of an Actiontec C1000A that was not entirely reliable. The Huawei HG612 seemed to fit the bill.
Most of the information about the HG612 is on UK sites, which is not a surprise since it is used by BT. The Kitz Wiki for the HG612 contains a lot of good info. It’s also useful to have the HG612 User’s Guide to refer to.
Out of the box, the HG612 uses IP address 192.168.1.1. To make the initial connection you will need to manually assign an address on the 192.168.1.x network (such as 192.168.1.100) to the machine connected to it as the DHCP server is not enabled by default. Once you have assigned yourself an IP address, you should be able to connect to http://192.168.1.1/ and login as user admin with password admin.
There are two main ways to configure the HG612 with CenturyLink: router mode or bridge mode. In router mode the modem handles the PPPoE login, performs Network Address Translation (NAT) and firewalling. Bridge mode is used when you want another device to handle, PPPoE, NAT and firewalling, such as a wireless router. In my case, I’m using an APU2 running OpenBSD as my router.
To configure the HG612 as a router, first configure the Basic settings. For the DSL configuration, the Modulation type should be set to ALL. You should not need to change the default ATM or PTM settings. The main changes are to the WAN and LAN settings.
First, select the ptm1.301 connection, if present, and click the Remove button. This connection is used for remote administration by BT and is not needed for CenturyLink.
Next, select and configure the ptm1.101 connection as follows, then click on the Submit button.
Be sure to set the Connection mode to Route, the Connection type to PPPoE, the VLAN ID (802.1q) to 201 and the VLAN Priority (802.1p) to 3. Also enter the Username and Password given to you by CenturyLink when you signed up for service. In _Route mode, Port binding should not be enabled for either LAN1 or LAN2. After you submit the changes, the Connection Name will change to ptm1.201 to match the VLAN ID.
Here you can change the LAN-side IP address of the router and configure the DHCP server.
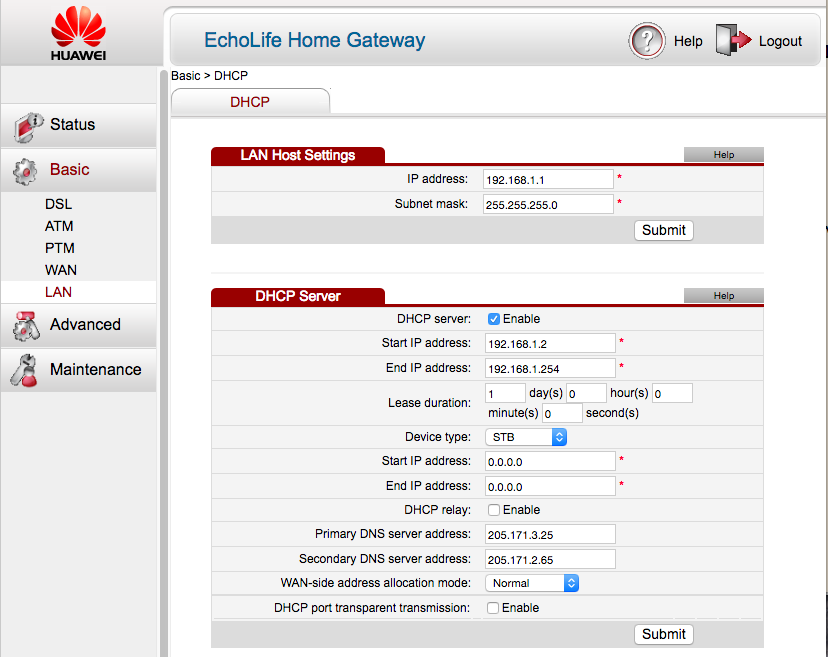
Be sure to set WAN-side address allocation mode to Normal. For DNS servers I’ve entered two of the addresses of resolver.qwest.net. You can also use OpenDNS or Google’s DNS servers.
The default firewall settings are designed for a bridging configuration so we’ll need to define out own set of rules for the router. First, create a custom firewall level, here I’ve called it simple, and click on the Submit button.
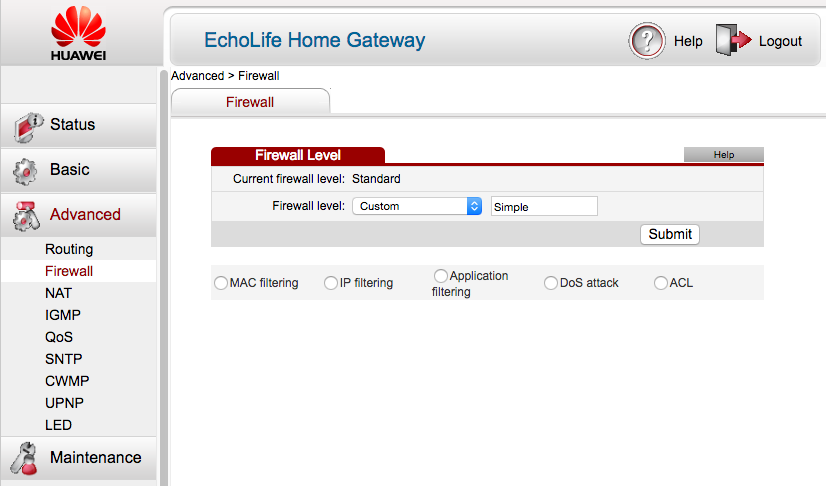
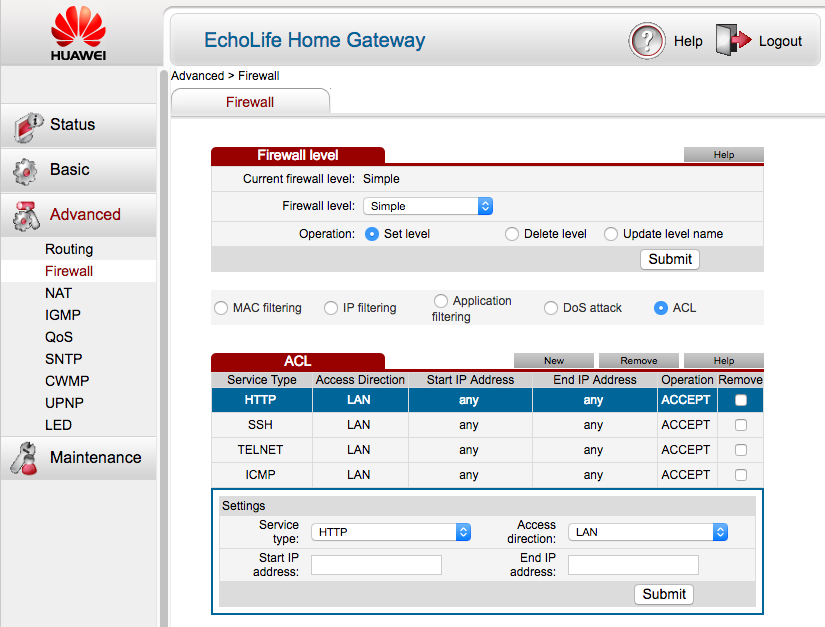
Next, click on the ACL radio button to set the access control list for the simple firewall level. Here you can configure access to the router itself. I’ve added rules to allow HTTP, SSH, TELNET and ICMP connections from the LAN side of the router. You can restrict these to specific IP addresses if you wish but be sure to allow yourself access to HTTP on the router or you will lock yourself out. I like having shell access too, hence the TELNET and SSH entries.
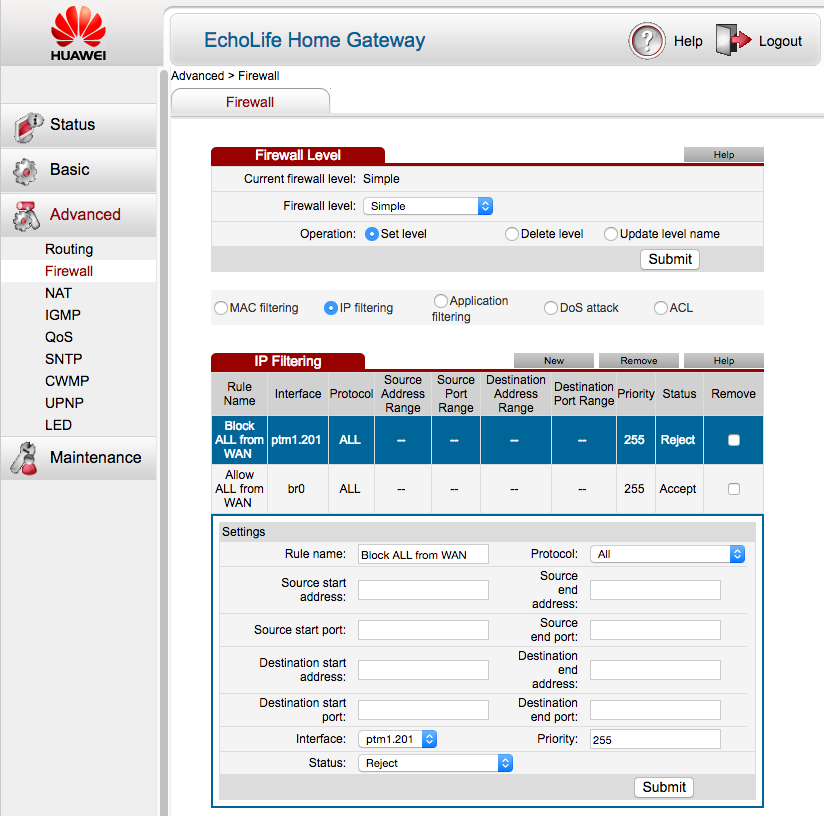
The final step is to configure the IP filtering rules. This is a simple filter that blocks all incoming connections from the WAN side and allows all outgoing connections from the LAN side.
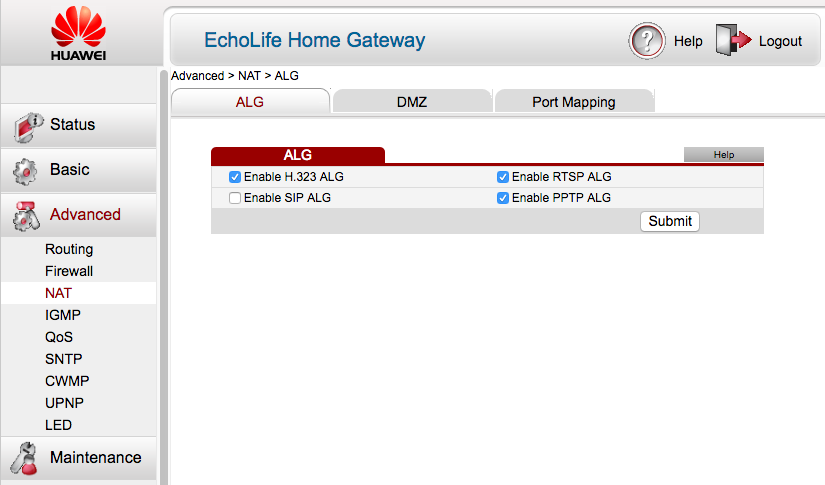
DMZ and port forwarding settings are available under the NAT menu
If you need to make internal services available to the outside world. You may also wish to enable UPNP if you have devices that need to automatically create firewall exceptions on the fly.
To configure the HG612 as a bridge, first configure the Basic settings. For the DSL configuration, the Modulation type should be set to ALL. You should not need to change the ATM or PTM settings. The main changes are the WAN and LAN settings.
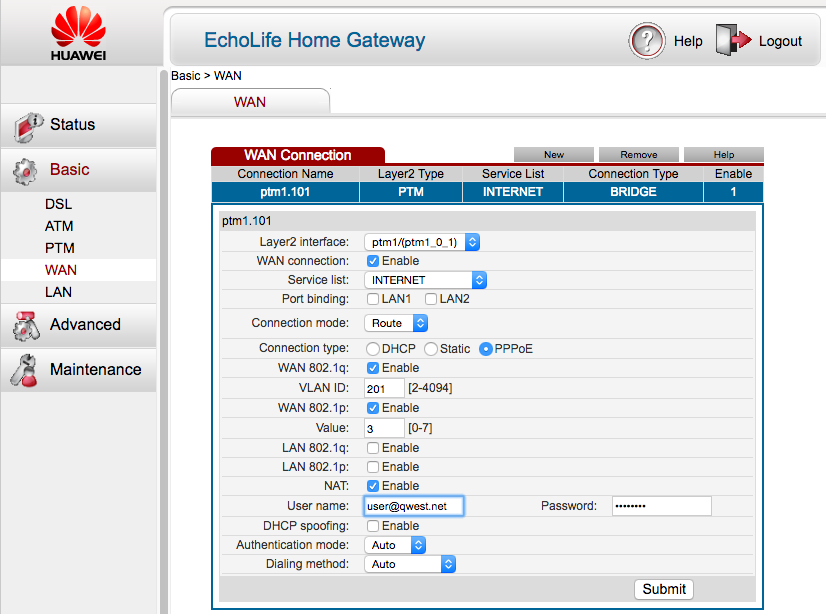
First, select the ptm1.301 connection, if present, and click the Remove button. This connection is used for remote administration by BT and is not needed for CenturyLink.

Next, select and configure the ptm1.101 connection as follows, then click on the Submit button.
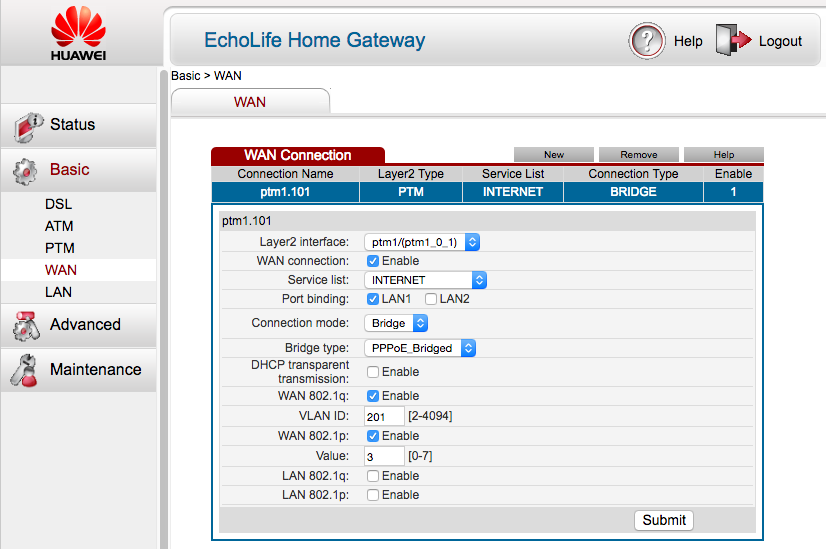
Note that under Port binding, LAN1 is selected. This will be the interface used for the PPPoE connection to your router. The LAN2 interface may be used to connect to the DSL modem for configuration and statistics gathering. After you submit the changes, the Connection Name will change to ptm1.201 to match the VLAN ID.
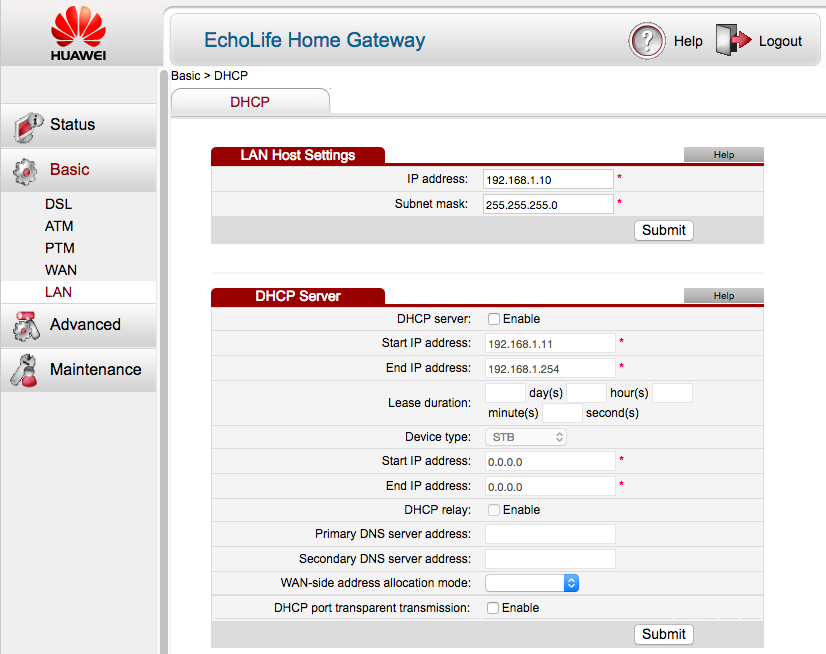
Here you should set the LAN-side IP address of the modem. Since another device is acting as a router, I’ve set the modem’s IP address to 192.168.1.10. The DHCP server should be disabled.